REMOTE LESSONS: Tech Tips / Improving Sound Quality
Wednesday, April 15, 2020 | Practicing and General Education
About this post: With some months of experience, we’ve gone through some tech troubleshooting and we’ve written this Tech Tips Checklist (below) to help you get more out of your LIVE VIRTUAL LESSONS.
FIRST THINGS FIRST Start by using whatever you have. Don’t be discouraged by technical challenges. Any device that works will be OK for a few lesson and for most beginner and early-elementary students.
IMPROVING SOUND QUALITY There are two issues to consider: delivering better-quality audio to your teacher; and receiving better-quality audio from your teacher. Audio matters more than video for our purposes, and most of the steps below to improve audio will also improve video.
There are many factors at play when it comes to delivering and receiving better-quality audio. In the checklist below, we cover the steps most likely to deliver improvements in your audio, in the order that will make the most difference. How much effort you should invest in this task varies based on your circumstances. Better-quality audio matters little for an elementary-level student taking just one or two remote lessons. Better-quality audio is absolutely vital for advancing students taking remote lessons long-term.
 STEP ONE Ask your teacher how you sound! You don’t know how you sound to teacher! Your teacher may tell you that you sound great already. If that’s the case, and you are not an advanced student, skip the rest of this post! The inverse is also true: if your teacher sounds terrible to you, they won’t know if you don’t tell them.
STEP TWO Use a high-quality laptop if you are lucky enough to have one. Turn off any microphone signal processing features that your operating system may be running. Detailed directions are beyond the scope of this post. This YouTube tutorial will show you how (use the chapter markers).
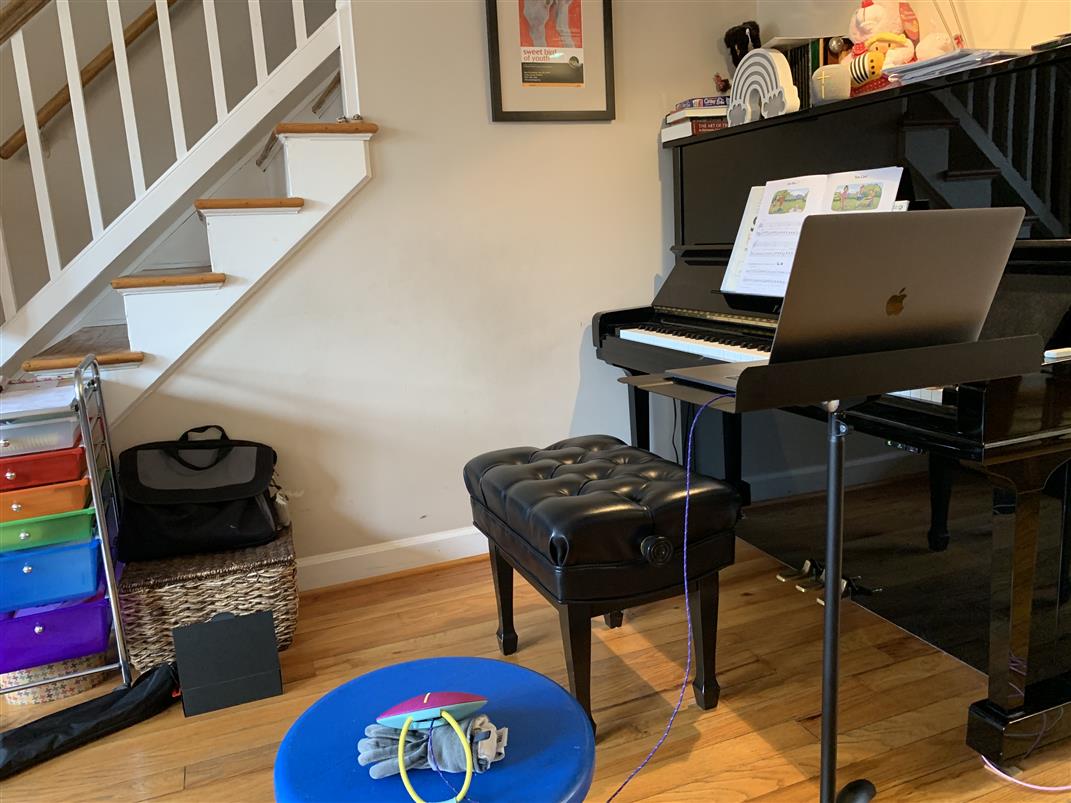
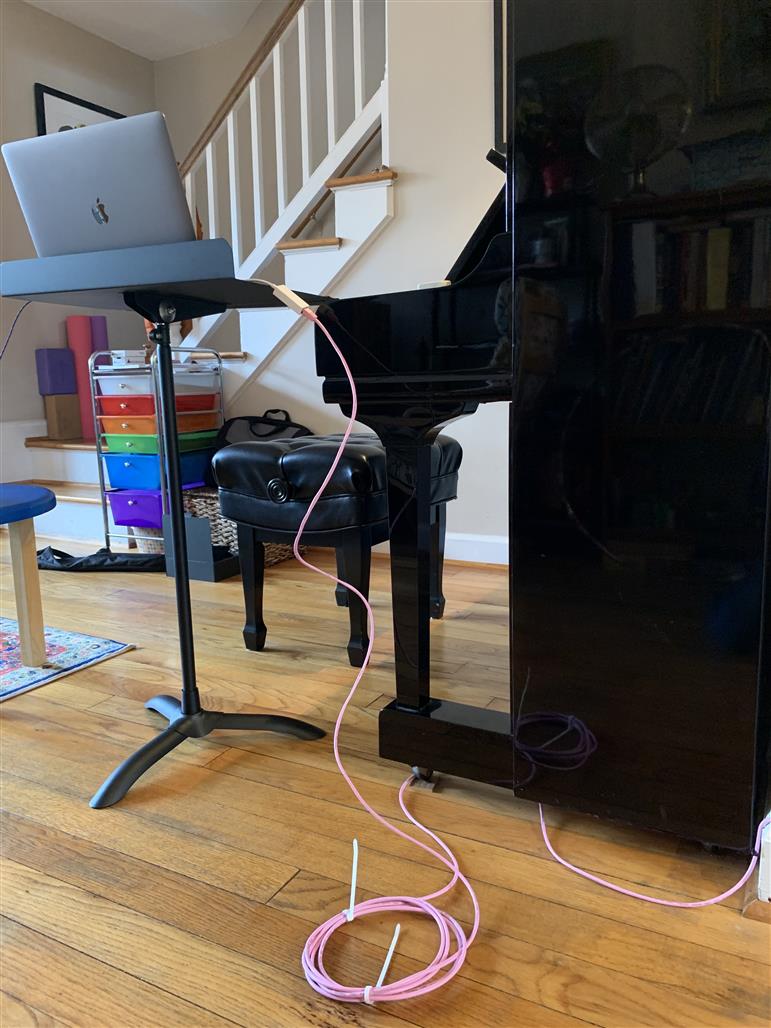
STEP THREE Test your connection speed. If you are relying on wireless, take your device and sit down next to your piano. Use a wired connection (ethernet) if you can. Go to speedtest.net and run a speed test. To receive good-quality audio from your teacher, you need a minimum of 10mbps/sec download. You probably have that already. To deliver good-quality audio to your teacher, you need a minimum of 10mbps/sec upload. If you are not able to test at or above 10mbps at your piano, troubleshoot your internet connection. If you are relying on a wireless connection, keep in mind that in some cases, you can test at very high speeds but you may still experience inconsistencies and momentary drop-outs in your Wi-Fi signal which may significantly degrade your sound. Using a wired internet connection (ethernet cable) may in some cases deliver a huge improvement in your sound. You can find 50-foot ethernet cables at Amazon for as little as $15.
 STEP FOUR Learn how to enable original sound in Zoom. Detailed directions are beyond the scope of this post. This YouTube tutorial will show you how (use the chapter markers). You may also consider the information on the Zoom support website. If you get distortion or static when playing or speaking loudly, adjust your mic input volume in audio settings within the Zoom app.
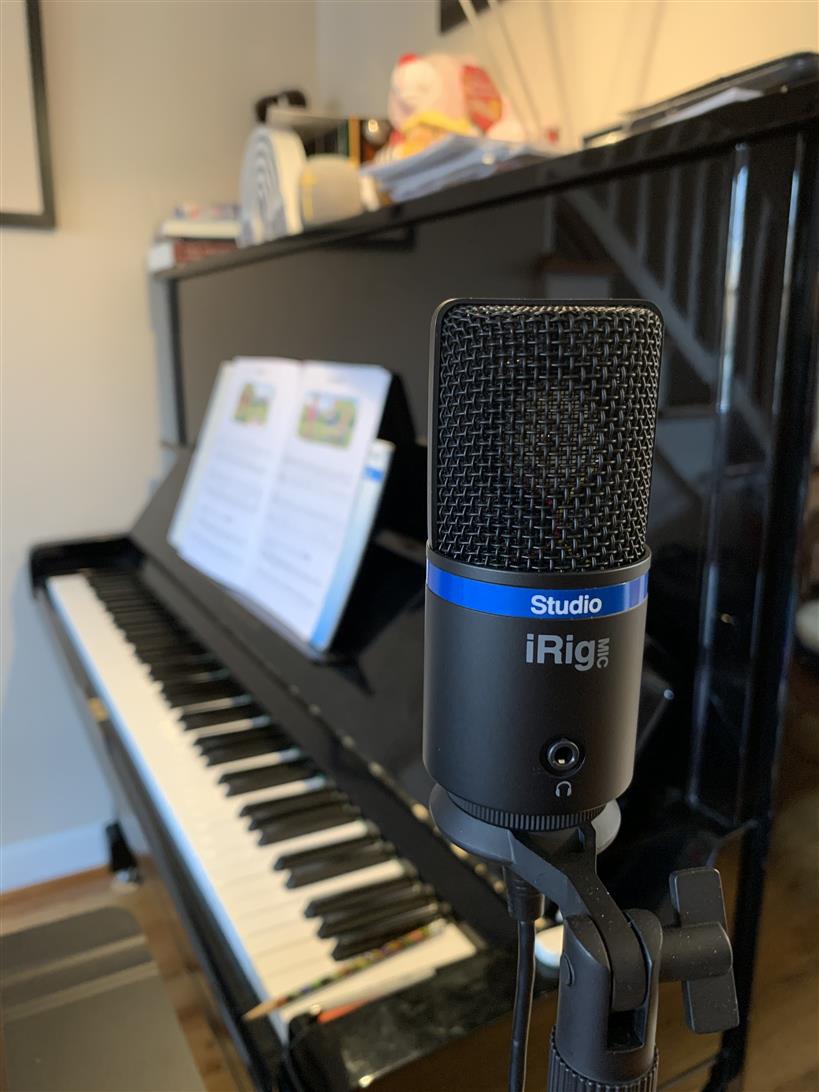
STEP FIVE Buy an external USB condenser microphone. A better microphone won’t make much difference if you haven’t taken care of all of the above steps first. But once you’ve taken care of those steps, a mic can really improve the sound you deliver to your teacher. The most popular are made by Blue, but there are many brands from which to choose. A pro-audio dealer such as Sweetwater Sound can provide high-quality devices and personal recommendations, at higher prices ($80-$200). But probably any USB condenser microphone selling for around $30 or more will be a huge improvement over your computer’s internal microphone. For ease of use, choose a USB microphone. Unless you already have a computer audio interface, avoid microphones with analogue connections (sometimes called TRRS or XLR).
 STEP SIX External speaker(s). Even on expensive laptops, the internal speakers on your device can’t give you great sound quality. And because they can’t be moved, your internal speakers may interfere with the sound you’re capturing. The microphone will pick up the sound coming from your speakers, which can create echo effects, fuzz, and otherwise degrade the audio you are hearing and/or sending. Any decent Bluetooth speaker will give you a big upgrade. Separating the speaker from the microphone (one device points one way, one points the other way), will further improve the sound you are hearing and/or sending. Use a wired connection to your speaker if you can, but if you can’t, the Bluetooth connection will probably work just fine.
STEP SEVEN Tips and tricks. Even after doing all of the above steps, you still might need to adjust settings as you go. Unlike the steps above, these tips are all situational. You won’t need to try everything!
• Try headphones. For better listening to your piano and for hearing safety, avoid wearing headphones throughout the entire lesson if possible.
• Turn off your original sound when you are not playing.
• Move closer to your microphone when speaking. The mic settings for playing the piano may not be optimal when speaking.
• Mute your speakers when you are playing extended passages
• Mute your mic when your teacher is playing extended passages
• Move your external speakers and microphone, experiment over time to find good placement.
• Make test recordings on your device to determine what settings sound best.
AND LAST... Don’t be discouraged. Start with whatever you have. Not everyone will need to go through every step.
